This walkthrough illustrates the most basic steps needed to complete a multi-step synthesis problem.
Note the context-sensitive help box under the target product on the right
which (in the actual system) will describe whatever control you last pointed the cursor at.
For further details, refer to the Help Page which describes the function
of all of the page controls.
Click on each screenshot to advance to the next step.
| Step 01: Using Starting Material Hints |
Top |
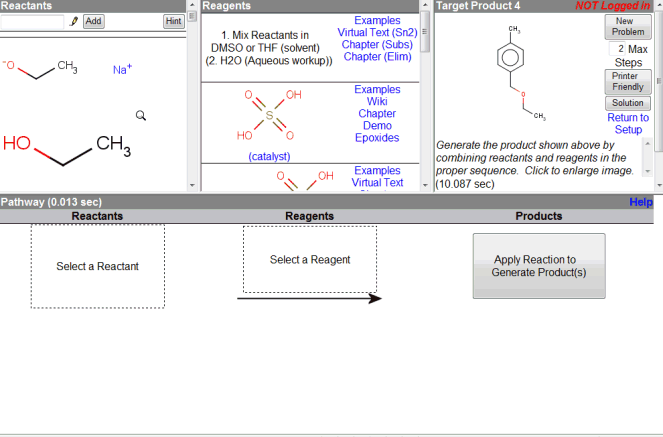 Your overall goal is to piece together a sequence of
reactants and reagents from the top-left and top-middle frames
to propose a synthetic pathway which reproduces the target product
in the top-right frame.
To make things easier,
click on the "Hint" button under the Reactants section in the top-left
to narrow down the list of possible starting materials.
|
| Step 02: Select a Reactant |
Top |
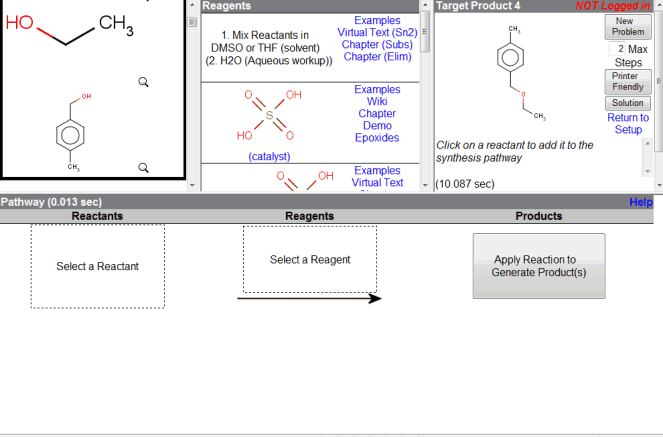 After using the Hint button, note that a black bar has appeared in the reactant frame.
To solve the current synthesis, you should only need the starting materials
listed above the bar, though you are also free to use other materials.
Click on the depiction of a starting material reactant in the top-left
to copy it to the Pathway workspace area.
|
| Step 03: Find a Reagent to Use |
Top |
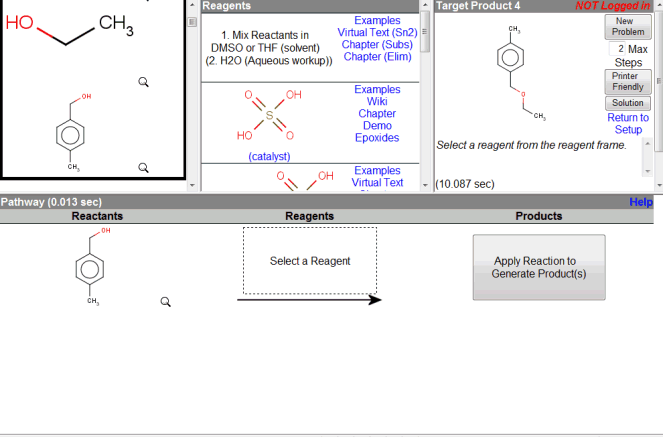 Scroll through the list of available reagents in the top-middle reagents
frame to find a reagent to use on your reactant.
|
| Step 04: Select a Reagent |
Top |
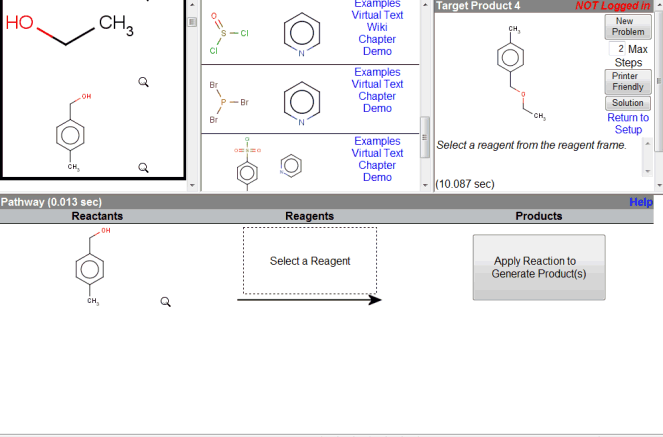 Click on the depiction of a reagent in the top-middle frame to copy
it to the Pathway workspace area.
|
| Step 05: Apply Reaction |
Top |
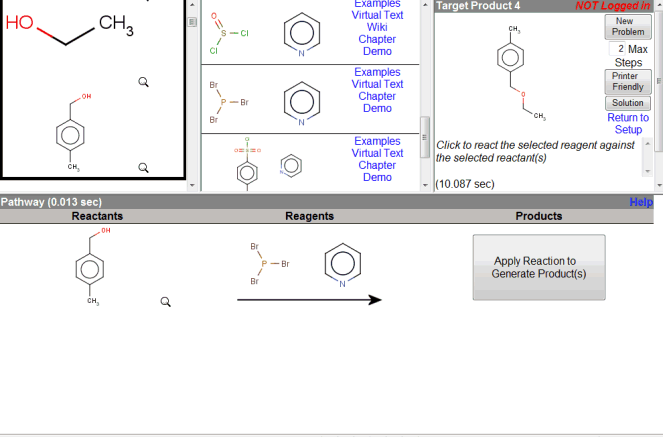 Once a reaction equation has been setup in the Pathway workspace area,
click on the "Apply Reaction" button in the middle-right
to have the system predict the products of the reaction.
|
| Step 06: Copy Product from Previous Step |
Top |
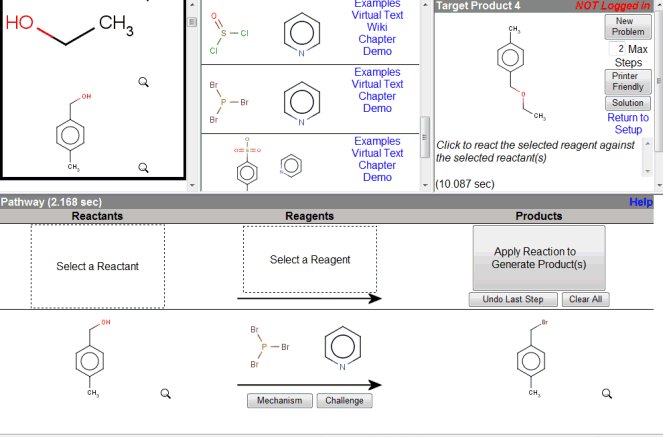 Click on any product from a previously completed reaction step,
to copy it to a new blank step in the Pathway workspace area.
This sets up a new reaction step to further the synthesis plan.
|
| Step 07: Find a Reactant to Add |
Top |
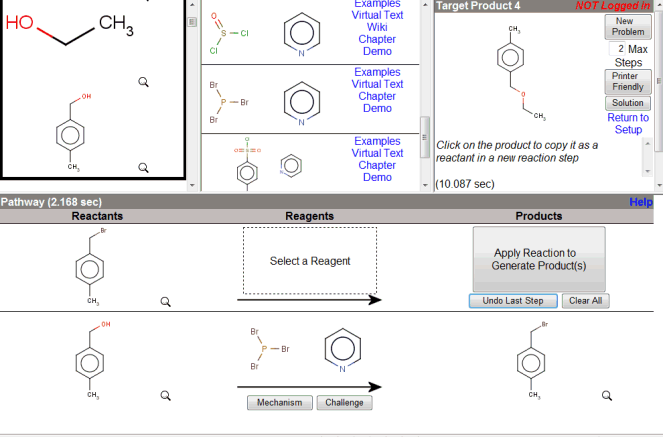 Reactions can involve more than one reactant.
In this case, the benzyl bromide carried over from the previous reaction
is a good electrophile, but we want to add a good nucleophile.
Scroll through the top-left Reactants frame
to find a reactant to add in this latest reaction step.
|
| Step 08: Select a Reactant |
Top |
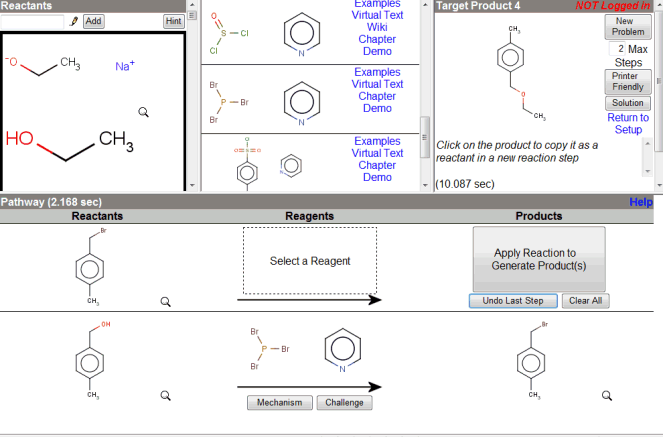 Click on a depiction of a starting material in the top-left Reactants frame
to add it to the current reaction step.
|
| Step 09: Find a Reagent to Use |
Top |
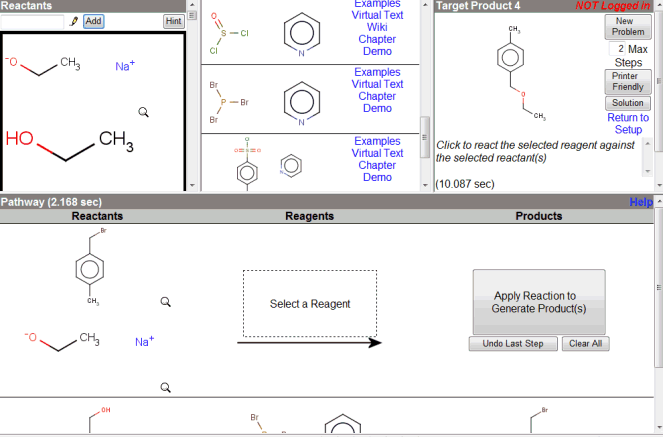 Scroll through the top-middle Reagents frame again
to find a reagent to use in this latest reaction step.
|
| Step 10: Select a Reagent |
Top |
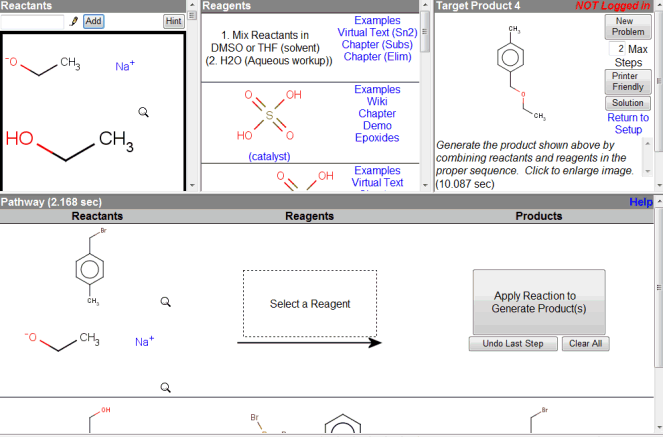 Note that in this case, there is no "reagent" exactly, since the reaction
is really driven by the reactants. In such cases, just pick an appropriate
"Mix Reactants..." or "catalyst" reagent to complete the reaction.
Click on the depiction of the reagent in the top-middle frame to copy
it to the latest reaction step in the Pathway workspace area.
|
| Step 11: Apply Reaction |
Top |
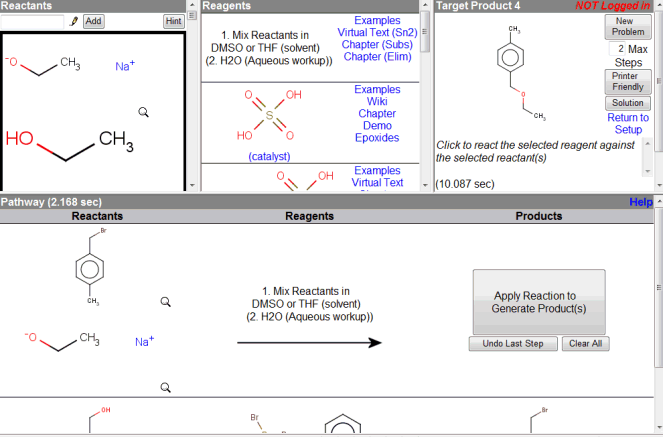 Click on the "Apply Reaction" button in the middle-right
to have the system predict the products of the latest reaction step.
|
| Step 12: Synthesis Problem Completed |
Top |
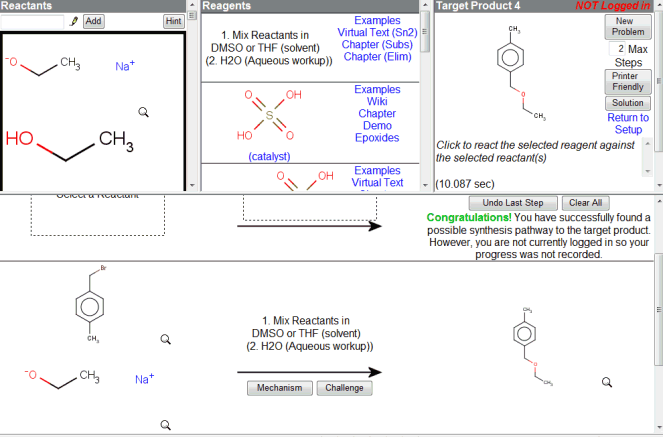 The predicted product of the last step matches the intended target product
in the top-right, thus completing the synthesis.
If you're ready to try another synthesis problem,
just click on "New Problem" in the top-right,
or click on the "Return to Setup" link below
to return to the tutorial home page.
Note the message in the middle-right congratulating you on solving
the problem. It should state "Your progress was recorded in the system"
if you are properly logged in to receive credit for your work.
Make sure your user ID (student ID number) was input correctly
during problem setup to properly record your progress.
|
|
 Your overall goal is to piece together a sequence of
reactants and reagents from the top-left and top-middle frames
to propose a synthetic pathway which reproduces the target product
in the top-right frame.
 After using the Hint button, note that a black bar has appeared in the reactant frame.
To solve the current synthesis, you should only need the starting materials
listed above the bar, though you are also free to use other materials.
 Scroll through the list of available reagents in the top-middle reagents
frame to find a reagent to use on your reactant.
 Click on the depiction of a reagent in the top-middle frame to copy
it to the Pathway workspace area.
 Once a reaction equation has been setup in the Pathway workspace area,
click on the "Apply Reaction" button in the middle-right
to have the system predict the products of the reaction.
 Click on any product from a previously completed reaction step,
to copy it to a new blank step in the Pathway workspace area.
This sets up a new reaction step to further the synthesis plan.
 Reactions can involve more than one reactant.
In this case, the benzyl bromide carried over from the previous reaction
is a good electrophile, but we want to add a good nucleophile.
 Click on a depiction of a starting material in the top-left Reactants frame
to add it to the current reaction step.
 Scroll through the top-middle Reagents frame again
to find a reagent to use in this latest reaction step.
 Note that in this case, there is no "reagent" exactly, since the reaction
is really driven by the reactants. In such cases, just pick an appropriate
"Mix Reactants..." or "catalyst" reagent to complete the reaction.
 Click on the "Apply Reaction" button in the middle-right
to have the system predict the products of the latest reaction step.
 The predicted product of the last step matches the intended target product
in the top-right, thus completing the synthesis.